Cucumber Framework Development…

For Cucumber Framework Development, we will reuse some of the steps and codes from our previous Hybrid Framework Development….
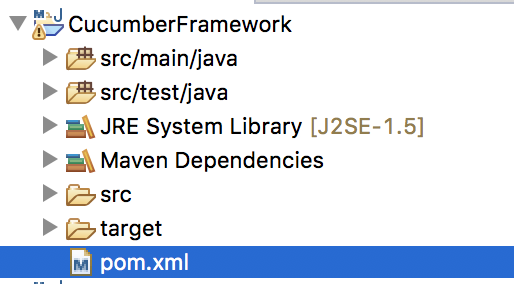
resources folder under src/main
  • The best approach is to clone the project from GitHub. Details will be provided at the end of this post.  Although we will be using most of the codes from  Part 1: Hybrid Framework Development…, there will be some changes in order to accommodate the Cucumber framework. The first change is in the  pom.xml file. As mentioned below, we will have to add additional dependencies for supporting Cucumber framework.
    <!-- https://mvnrepository.com/artifact/info.cukes/cucumber-java -->
    		<dependency>
    			<groupId>info.cukes</groupId>
    			<artifactId>cucumber-java</artifactId>
    			<version>1.2.5</version>
    		</dependency>
    <!-- https://mvnrepository.com/artifact/info.cukes/cucumber-junit -->
    		<dependency>
    			<groupId>info.cukes</groupId>
    			<artifactId>cucumber-junit</artifactId>
    			<version>1.2.5</version>
    		</dependency>
    <!-- https://mvnrepository.com/artifact/info.cukes/cucumber-picocontainer -->
    		<dependency>
    			<groupId>info.cukes</groupId>
    			<artifactId>cucumber-picocontainer</artifactId>
    			<version>1.2.5</version>
    			<scope>test</scope>
    		</dependency>
    
  • Our next step is to install the Cucumber plugin into Eclipse. This plugin provides a lot of support in creating feature files. To install click Help -> Eclipse Marketplace in Eclipse. Type in ‘Cucumber’ to search for the plugin and then click install to complete the installation. Eclipse restart will be required.

    Eclipse Marketplace
  • Next step is to create some source folders for the resources. Maven by default will create a resource source folder for the main when we use ‘properties-maven-plugin’ in our pom.xml. We need to create one more for the test. To create a source folder under test, right click ‘src/test/java’ folder -> Build Path -> Configure Build Path -> Add Folder. Name the folder as ‘src/test/resources’.
  • Once the resources folders are created, our Project Structure will look as below. Notice we have four source folders.
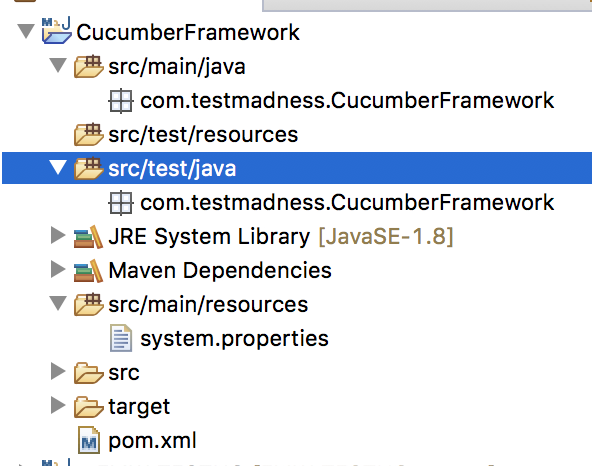
    Project Structure after adding resource folders.
  • The above folder structure will help us to manage our source files. For example, ‘src/main/java‘ folder will contain all our page object-related and utility source files, ‘src/test/java‘ folder will contain our step definitions, runner and hook, and ‘src/main/resources‘ will contain properties files and ‘src/test/resources‘ folder will contain our Cucumber feature files.
  • To create a feature file, right click ‘src/test/resources‘ folder and click New -> Other. Select File inside General. Click Next and name the file as ‘TC001_FindFlights.feature’. Notice ‘.feature‘ will be the extension of our feature file.

    Create Feature file
  • Our next task is to create a test case using Gherkins language. For now, we will create a simple test case where a user navigates to New Tours Demo website, enters username and password, click the login button and verifies the ‘Flight Finder page’.  When we write our test case in Gherkins, we have to make sure that we have a Feature and a Scenario or Scenario Outline as displayed below. We will discuss more on the difference between Scenario and Scenario Outline.

    Feature file
  • Our next task is to create a Cucumber Runner class. Cucumber uses JUnit framework to execute the code. This class will use @RunWith() annotation which tells JUnit to start the execution of our tests. This is very much similar to Java main method.
  • To create a Runner Class, create a package ‘com.testmadness.runner’ and inside that create a new Class named ‘DemoTest’. Notice that we need to use ‘Test’ in our class name so that Maven can execute the Runner class. Copy below code in our Runner class. This Class doesn’t require any code, it just requires annotations to execute and find locations of feature files and step definition classes.
    import org.junit.runner.RunWith;
    import cucumber.api.CucumberOptions;
    import cucumber.api.junit.Cucumber;
    
    @RunWith(Cucumber.class)
    @CucumberOptions(plugin = {"pretty", "html:target/cucumber"}, 
    features = "src/test/resources/", glue = {"com.testmadness.stepdefinition", "com.testmadness.hooks"}, tags = "@TC002")
    public class DemoTest {
    	
    }
    

    Runner class
  • Next task is to create corresponding codes for each line of ‘Given’, ‘When’, ‘Then’ and ‘And’ statements. We can create the structure of the code by doing a test run. Right-click the Runner class ‘DemoTest’ and select Run As -> 2 JUnit Test. Once the execution is complete, we can view the code structure as displayed below in the console.

    Step Definition
  • Next step is to place the above method in a Step Definition class. Right-click ‘src/test/java’ folder and create a new package ‘com.testmadness.stepdefinition’. Inside this package, we will create a new class named ‘Home_Step’. There is no need to create separate classes for placing step definition methods but since we are following a page object model approach in our framework, it’s better to separate step definition methods for different pages.

    Step Definition class for Home Page
  • Notice that the step definition class has a constructor where we are creating an object of ‘HomePage’ class. The ‘HomePage’ class will have page related element locators as well as page related specific methods. This separation makes the code more readable and easy for maintenance.
  • Our next task is to create a Hook class. Cucumber Hooks allow us to reduce code redundancy. For example, repeating steps like opening and closing of a browser can be written inside @Before and @After methods. A @Before method will run before the first step of each scenario and a @After method will run after the last step of a scenario. Apart from these two, there are other methods also like the @AfterStep which can be used to execute after every step.

    Hook class
  •  Notice that in the above Hook class, Log4j, Extent Reports, and Web Driver are initialized in the @Before method whereas codes for closing Web Driver and taking screenshots are placed in the @After method.
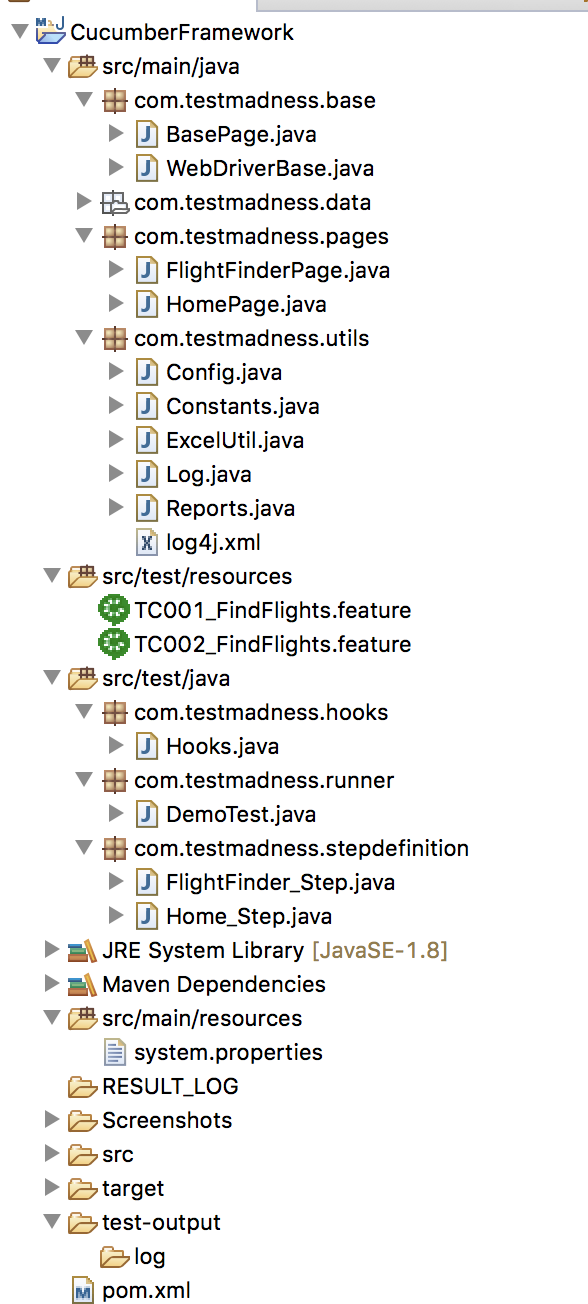
    Project Structure
  • We can execute our Cucumber scripts in two ways – Right-click Cucumber Framework and select Run As -> Maven test or else Right-click the Runner class ‘DemoTest’ and select Run As -> JUnit Test.
    Run as Maven Test

    Run as JUnit Test
  • The reporting in this framework is same as of our last framework Hybrid Framework Development…. We have used both Extent and Log4j reports.
    Extent Report

    Extent Reports and Log4j Reports


The complete project is available on GitHub.
https://github.com/autotestmadness/CucumberFramework

With this, we have completed our Cucumber Framework development. Please feel free to comment and share your thoughts. More topics to follow, until then Happy Learning!


Introduction to Behaviour Driven framework…

Cucumber is one of the most widely used BDD (Behaviour Driven Development) tools. Before diving deep into a BDD tool, let us first discuss on TDD and BDD approach.

TDD or Test Driven Development approach is actually converting Software requirements into automated test cases. It’s generally described as writing a failing test case first and then make the test pass and then refactor. In other words, throughout the development cycle, the test cases are run over and over again, thus improving the software as test cases pass. This is more of a  developer oriented approach.

BDD or Behaviour Driven Development approach is actually defining the user behavior first, before writing automated test scripts. User behavior is defined after a collaborative discussion by QA, Developers, and Business. Once the behavior is finalized, test cases are written in a plain English language using ‘Given’, ‘When’, ‘Then’, ‘And’ keywords. Developers start writing the functional code only after user behavior is defined. This actually reduces the risk of developing codes that deviates from accepted user behavior.

There are many tools similar to Cucumber, such as Jbehave, Nbehave, specflow, JDave etc. However, Cucumber is widely used because it is simple and easy to use. Also, the default reports for Cucumber looks good and with Jenkins/Bamboo plugins, it can generate good-looking reports.

In this post, we will mainly focus on creating a BDD framework using Cucumber. Our new framework will have all existing features from our old Hybrid Framework which actually follows a TDD approach.

Before we move into development, let us first focus more on the framework details:

  1. This framework will be developed in Eclipse using Maven. The pom.xml will almost be same as mentioned in Hybrid Framework, however, we will have to add Cucumber dependencies like Cucumber-core, Cucumber-java, Cucumber-java-deps, Cucumber-jvm etc..
  2. We will use Gherkins language for defining user behaviors which are nothing but .feature files. Cucumber understands and executes these .feature files. A .feature file will at least contain a Feature name,  Scenario and executable statements having keywords like ‘Given’, ‘When’, ‘Then’, ‘And’. Note that a Feature can have multiple scenarios in it.
  3. Gherkin itself is very simple, readable plain English text with a little extra structure. To learn more about Gherkin syntaxes, visit cucumber.io website.
  4. Once the user behavior is defined using Gherkins language, our next task will be to create step definitions. A step definition is a Java method with an annotation above it. The annotation is followed by a pattern which is used to link the Java code to a particular Gherkin step. We will be able to follow more as we proceed with framework development.
  5. Cucumber will create its own reports, however, we will also use Extent reports in our framework.
  6.  New Tours Demo will be our demo application.


This is just an introduction to what we are going to develop in our next post. I am quite sure that it’s going to be an interesting one. Keep following, till then, Happy Reading!

Working with a Remote Repository…

Till now we have been able to do the version control on our local machine and not share details with anybody. However, Git becomes more powerful when we collaborate with others using a remote server. This way other people can see them, download the changes that we made, to their local repositories, make their own changes and upload back to the remote server and this way we can download the changes to our local repositories. There is no real difference between a remote and a local repository. Like the local, it contains branches, commits and has a HEAD pointer. However, a local repository has a working directory where some version of our project’s files is checked out. Whereas a remote repository doesn’t have such a working directory: it only consists of the bare “.git” repository folder.

The Remote Server concept is pretty straightforward. As displayed below we have a Local Machine where we have a master branch with commits on it. Now we are going to introduce a Remote Server. We will move the commits from our master branch in local machine to the Remote Server using a process called Push. This means we push same commits from our Local Machine to the Remote Server. At the same time, Git also creates a new branch called origin/master on our local machine. This new branch always refers the Remote Server branch and tries to be in sync with the Remote Server.

Pictorial representation

As we continue our development and make further commits on our local machine and when we are ready to share, we push them to the Remote Server and the origin/master branch in our local machine also tries to in sync with the remote one. When other people push changes from their local machines to the Remote Repository, we can pull those changes down to our local machine using a process called Fetch. Notice that Fetch only updates the origin/master branch and it does not bring any updates to our master branch. To update in the master branch we need to do a merge and, at that point, the origin/master and the master branch will be in sync.

Now, in reality, Git is smart enough not to save same Git Objects twice as origin/master and master, instead, it uses two HEAD pointers pointing to same Git object.

Setting GitHub Account:

GitHub is a web-based version control Git repository service which is freely available. GitHub has paid plans too but for now, we will be using their free service.

    1. Our first task is to set up a GitHub account. To create an account, go to  GitHub website and complete the sign-up. Enter the username, email id, and password to complete the sign-up process.  Once sign up is complete, we have an option to continue as unlimited public repositories for free or select unlimited private repositories. Please note that using unlimited public repositories will allow everyone to view the project whereas using private repositories will allow only private parties to view the project. We will select the free version and click continue to complete the setup. Please note the UI may change over time but the sign-up should be pretty straightforward.
    2. Once sign-up is complete, our next step is to create a new repository. We can give any name to our repository. We will be using the same name from our Eclipse project. Once details are filled, click Create Repository button to create a new one.

      Create new repository in GitHub
    3. Once a new repository is created, we get 3 options – the first one is to create a new repository on the command line from our local machine. This we already completed, please refer Part 1: Working with Git…, the second one is to push an existing repository from the command line – here we will be using this option as we have an existing repository in our local machine, the third one is to import code from another repository. This we will not be using as we are using Git repository only. Notice the highlighted area. We will use this highlighted command to add a remote to our Local Machine.

      Repository options
    4. Our next task is to inform our repository in our Local Machine where it can find the remote repository. Switch over to the command line and navigate to our project folder. Type in commandgit remote to list out all the remotes that we have. Since we don’t have any remotes configured, the command will not list any remotes. To add a remote type in the command git remote add origin https://github.com/autotestmadness/HybridFramework.git. Please note that origin is the name of our remote. By default, the name is origin as displayed in above screenshot, however, we can use any name. The URL following is the location of the remote repository. After adding the remote if we use the command git remoteagain, it will list out all the remotes. Notice that origin is now added.

      Adding a Git remote
    5. Some additional commands:
      // To get more information on the URL to fetch and push
      git remote -v
      
      // To remove a particular remote
      git remote rm origin
      
      // To view remote details in config file
      cat .git/config
      
      // To view all remote branches
      git branch -r
      
      // To view all branches both local and remote
      git branch -a
      
    6. Our next step is to push our code to our remote repository. Type in command git push -u origin master. This command will push the code from our master branch to origin, which is the remote repository. To complete the process Git will ask for the GitHub username and password. Once the details are shared, it will compress and upload the code to the remote repository. Now as mentioned earlier, after pushing the code to the remote, Git will create a new branch name origin/master (refer the gif image for easy understanding). If we don’t use ‘-u‘ in our Git push code, Git will never be able to track the origin/master branch with the remote. So it’s always recommended to use ‘-u’ when doing our first push to remote.
      Pushing the code from master branch to remote

      Code pushed to the remote
    7. The new branch details can be found inside .git/refs/remotes/origin folder. Now if we use the command cat .git/refs/remotes/origin/master, we can see the SHA value of the last commit. This will be same as that of the master branch.

      origin/master branch details
    8. We can push more than one branch from our local machine to remote. For example, we can push one more branch named ‘mergebranch’, created in our last post Part 2: Working with Git… using the command git push origin mergebranch. Notice that this time we have not used ‘-u‘ in Git push command, as a result, origin/mergebranch will not be tracked to the remote. We can confirm by going to .git/config file. Notice (third screenshot) that there is a mapping between master (local) and origin/master (remote) as we used ‘-u‘ in our first push but there is no mapping between mergebranch (local) and origin/mergebranch (remote).
      origin/mergebranch created in remote
      mergebranch created in GitHub

      No mapping present for mergebranch
    9. In the last step, we learned how to push our local code into GitHub. This is useful when we are pushing code for the first time to GitHub. Now, what happens when there is already a project available on GitHub and we want to clone it into our local machine? In this step, we will clone the same project from GitHub and into the workspace present on our local machine. Notice that when cloning, tracking branch will be created by default. We can verify the mapping by viewing the .git/config file.
    10. To clone a project we will use the command git clone https://github.com/autotestmadness/HybridFramework.git ClonedHybridFramework. Notice that the command has the URL from GitHub and a name of the project directory on our local machine. If we are not using a name then by default a directory named ‘HybridFramework’ will be created. Since we already have a directory with the same name in our workspace, we will use a new name for the cloned project. Once the project is cloned, we can use the command ls -la to verify if everything is fetched from the remote.

      Cloning from GitHub
    11. Once we are inside the ‘ClonedHybridFramework’ folder, we can use the command git branch -a to list out both local and remote branches. Notice that in local we have only the master branch but in remote we have two branches – origin/master and origin/mergebranch.

      List of branches from local and remote
    12. Now we will simulate a scenario where two people will be collaborating with each other in GitHib. For that, we will use ‘HybridFramework’ and ‘ClonedHybridFramework’ directories. We will make changes in ‘HybridFramework’, commit our changes, and move the change to the remote. Then we will ensure that ‘ClonedHybridFramework’ gets the change. Even though both directories are on the same local machine, but repositories in both directories are different. Hence it will look like as if two different people are collaborating with each other.
    13. We will update the readme.txt file inside ‘HybridFramework’ folder and then commit the changes into the master branch. We follow the same process mentioned in our last post Part 1: Working with Git…. Notice that when we do git status after the commit in master branch in local, Git informs that the remote doesn’t have the latest commit.

      Updating readme.txt file in HybridFramework directory
    14. Next step is to push the last commit from ‘HybridFramework’ to the remote. Type in the command git push to push the changes to the remote. Since the origin/master branch is already mapped with the remote, we don’t have to use ‘-u’ in the command and also there is only one remote that is the origin, so we can simply use git pushcommand. Upon successful push, the GitHub will be updated with the latest commit.

      Latest commit updated into GitHub
    15. Now let’s switch to the ‘ClonedHybridFramework’ directory. If we do a git log --oneline origin/master -3, we will not see the latest commit in ‘ClonedHybridFramework’ directory. It doesn’t exist in origin/master or in master.  To reflect the changes in origin/master, we will have to Fetch the changes into ‘ClonedHybridFramework’ directory. Notice that after Fetch, the changes exist in origin/master branch but not in the master branch.

      git fetch to update in origin/master branch
    16. Our next task is to sync up the master branch with that of origin/master branch in the ‘ClonedHybridFramework’ directory. To sync up, we have to merge the changes from origin/master branch to master branch. The merging process is exactly same that we learned in our last post Part 2: Working with Git….
    17. To merge into master, ensure that we are in master branch and then type in the command git merge origin/master. Notice that this is a Fast-Forward merge as we did not do any changes in the master branch.

      merge the changes from origin/master to master
    18. If we do a git log now in both branches, we can view the latest commit in both master and origin/master.

      Latest commit available in master branch
    19. Its always recommended to do a Fetch first and Fetch often, then Merge, and then Push the changes to the remote.
    20. There is a very convenient command git pull which is actually a combination of Git Fetch and Git Merge. This single command will first complete the Fetch process and then do a Merge.
    21. As we have seen, we only have master branch checked out in ‘ClonedHybridFramework’ directory. What if we want to check out ‘mergebranch’ also from the remote? We can checkout using the command git branch mergebranch origin/mergebranch. Here we are creating a new branch named ‘mergebranch’ in local which is tracked to remote branch ‘origin/mergebranch’. To checkout the new branch directly, we can use the command git checkout -b mergebranch origin/mergebranch.

      Remote branch is checked out
    22. We can verify the mapping by viewing the .git/config file inside ‘ClonedHybridFramework’ directory.

      .git/config file with tracking details


With this, we came to end on remote repository topic. Hope you were able to follow most of it. Until next post, Happy Learning!


Part 2: Working with Git…

In this post, we will focus mainly on branching and merging techniques in Git. They are very powerful features in Git. For example, there is a master branch that we are working on it and suddenly we get an idea of a new feature that we want to add but we are not sure if the new feature will work out or not. Now instead of making changes and commits to our master branch and then trying to redo if there is an issue, Git allows us to create a new branch which can be used to add our new feature. We can switch back and forth between master and newly created branch. If the idea doesn’t work out, we can throw away the newly added branch without affecting the master branch and if the idea does work out then Git allows to add changes to the master branch through a process called merging.

Here also we will use our Hybrid Framework project to learn the branching and merging techniques.

Create a new branch

    1. Open the Terminal and navigate to Project folder and then do a git status. Our Master branch will be clean and there will be nothing to commit as displayed below.

      git status
    2. Type in git branch to view all the available branches. Currently, we have only one branch and that is the master branch. Notice the * placed near to Master. This means the head is pointing currently to Master branch.

      git branch
    3. To create a new branch, type in git branch newframework and hit return. To make sure that new branch named ‘newframework’ is created or not, use git branch command to view all branches. Notice that the * is still placed near to Master. This means the head is still pointing to Master branch as the Master code is checked out.

      New Branch
    4. ls -la .git/refs/heads will list out all the heads available. cat .git/refs/heads/newframework will display the hash value of our last commit in ‘newframework’ branch. Notice that this is exactly same as the last commit of our Master branch. Only when we start doing new commits to the new branch the values starts changing.

      Heads
    5. As mentioned in the previous step, currently Master branch is checked out. To checkout ‘newframework’ branch, type in git checkout newframework. We can confirm which branch is checked out by typing in git branch. Using cat .git/HEAD command, we can confirm to which branch HEAD is pointing to. Notice that * is now placed near to ‘newframework’ branch.

      Branch checkout
    6. Now let’s do some changes in our Hybrid Framework project and commit the changes to the new branch ‘newframework’. We will edit the readme file and add few more details as displayed below and then save it.

      Changes done to readme file
    7. To commit the changes in ‘newframework’ branch, first, do git status to confirm on the changes and then do a force commit using the command git commit -am "Updated read me file in newframework branch". Notice that the updated readme.txt file is committed in ‘newframework’ branch and not to master branch.

      Committing to new branch
    8. Using command git log --oneline we can get the log of commits done in ‘newframework’ branch. Notice that the HEAD is pointing to ‘newframework’ branch and also new hash value is created for the new commit.

      git log of newframework branch
    9. To verify that the new changes are not committed to Master branch, use git checkout master command to checkout the Master branch. Use git branch to confirm the checkout.

      Checkout master branch
    10. Once Master branch is checked out, we can open the readme file in our Hybrid Framework project to verify if we have the updated readme file or not. Notice that we no longer have the updated readme file as the current branch is Master.

      readme file from Master branch
    11. To switch back to the new ‘newframework’ branch, type in git checkout newframework. This will checkout the ‘newframework’ branch and we can see the updated readme in eclipse.

      Switched to newframework branch
    12. One point to remember while switching branches is that we need to commit all changes made to existing files in the current branch before switching to another branch. Otherwise, Git will abort the process as there is data loss. However, if are adding new files in the current branch and then try switching to a different branch, Git will allow us to switch as there is no data loss happening.
    13. There are some additional commands that can be used while creating branches.
      // Create a new branch and checkout at same time
      git checkout -b new_branch_name
      
      // Get more detailed log information when using multiple branches
      git log --graph --oneline --decorate --all
      
      // Compare two different branches
      git diff master..newframework
      
      // Find out whether one branch completely contains another branch or not
      git branch --merged
      
      // Renaming a branch
      git branch -m newframework updatedframework
      
      // Delete a branch. Notice that Git will not delete the current branch
      git branch -d updatedframework
      
      // Forcefully Delete a branch. This is used when to be deleted branch has recent commits
      git branch -D updatedframework
      

Merge branches

  1. Now we decide that newly added functionality for which we created a new branch is working perfectly and we want to bring the changes to original branch so that they are the part of main project. Well, in order to do that we will use merging technique. In our case whatever changes that we did in ‘newframework’ branch will be merged to Master branch.
  2. We can view the differences by using git diff master..newframework command. Notice the difference between two readme files found in master and ‘newframework’ branch.

    git diff between master and newframework branch
  3. The first step is that we want to make sure that we checkout the branch that things are being merged into. In our case, the master branch is going to the receive the changes from ‘newframework’ branch. In other words, we will checkout the master branch. Use git checkout master command to checkout the master branch.
  4. To merge use git merge newframework. Here ‘newframework’ is target folder and master is the receiving folder. Once merging is complete, we can verify the same in Eclipse. The readme.txt in master branch is exactly same as ‘newframework’ branch. Notice that the latest SHA value in master branch matches to that in ‘newframework’ branch.

    git merge newframework
  5. The above merging process is called Fast-Forward merge. This is because when we merged ‘newframework’ branch to master branch, there were no changes made to master branch after the creation of ‘newframework’ branch. As a result no new commits are made in master branch, instead, Git just fast-forward the last commit from ‘newframework’ branch to master branch and move HEAD along with it. Now of we do git log --oneline in master branch, we can see that the Hash or SHA value is same as that in ‘newframework’ branch as displayed in above image.
  6. If we don’t want Fast-Forward merge in the above case, we can force Git to make a no Fast-Forward merge using the command git merge --no-ff newframework. This process will create a new commit in the master branch instead of doing the Fast-Forward merge. Similarly, we can also force Git to always do Fast-Forward merge only using the command git merge --ff-only newframework . Notice that this command will work only we can do a  Fast-Forward, otherwise, it will abort.
  7. If there is a commit on the master branch then its no longer a Fast-Forward merge as the HEAD moved to a new commit that’s not in the other branch. To simulate this merge, we will checkout a new branch ‘recursivebranch’ and add a new commit. Similarly, we add a new commit to master also. Although there is a common ancestor in both branches, the HEAD is pointing to a new commit in master which is not there in ‘recursivebranch’.
    New commit in master branch
  8. To merge ‘recursivebranch’ into master master, we will use git merge recursivebranch command. As mentioned earlier, we need to be in the master branch. As soon as we hit enter, Git popped up a Nono editor asking us to enter a commit message. Nano editor gets opened because in .gitconfig file, default editor is set as Nano editor. We will just save with the default message ‘Merge branch ‘recursivebranch”. All of the other lines are going to be ignored and left out of the commit message.

    Commit message in Nano editor
  9. As soon as we Save and Close the Nano editor, below message, will be displayed.

    Recursive strategy
  10. Git has different merging strategies and Recursive is one of them. Now if we do a git log --oneline in both branches, we can see a new commit is done into master branch. It may seem that there is a conflict happening as there are different commits to two different branches but Git is able to successfully handle the merge as it understands that the commit made to master is the latest one. Notice that the SHA value from ‘recursivebranch’ is saved before the last commit in master branch as Git is pretty good at figuring out on how to merge things in.

    Git log
  11. Sometimes when there are two changes to same line or set of lines in two different commits, Git doesn’t know which one to use or how to merge them together and we get a merge conflict.
  12. To create a merge conflict scenario, let create and a new branch ‘mergebranch’ using git checkout -b mergebranch. In this branch, we will update the readme.txt file by deleting some comments and then updating few comments as shown below. Commit the changes to the new branch and then checkout master branch.

    Updated comments in readme.txt file for ‘mergebranch’ branch
  13. In master branch, we will not remove any comments instead just a small update to the existing one as displayed below. Commit the changes into the master branch.

    readme.txt file update in master
  14. Now when we try to merge the ‘mergebranch’ into master branch, we get below merge conflict message from Git. This is because Git is not sure which of the lines it need to prefer from readme.txt file. This is where Git requires our intervention.

    Merge conflict
  15. Now if we open our readme.txt file in eclipse, Git will mark the areas where ever it is finding conflicts. Notice that it will mention which all content belong to HEAD, that is the master branch and which all belongs to ‘mergebranch’ with a bunch of equal signs between them. Now its up to us to go through and decide which block of lines that we require to be committed to master branch.

    Merge conflict displayed in readme.txt file
  16. When we do a git status, we will notice that the merge is not successful and Git wants us to resolve the conflicts in order to complete the merge. We have three choices to resolve merge conflicts and they are to abort, to resolve manually, or to use merge tools. Here we will not take the third approach.
  17. To abort a merge, type in git merge --abort command to abort the merge. This will simply abort the merging process and everything will go back to the state before the merge process.
  18. Another way is to go to readme.txt and manually do the changes. Here we will confirm which block of lines to use and remove the references to HEAD, ‘mergebranch’ and equal signs. Notice that Git will mark the document where ever it is finding conflicts, so the best approach is to scan the entire document which has a conflict.

    Manually resolving merge conflict in readme.txt file
  19. Once we are satisfied with changes, we need to save and close it. We can do git add readme.txt to add the file into staging. And we are ready to commit, we can directly use git commit without any message. Git has a default message for commit during the merge process. We can remove conflict comment and save the default comment.

    git commit for merge
  20. To confirm if the merge is successful or not, we can do git status and then compare logs from both branches as displayed below. Notice that master branch has the last commit from ‘mergebranch’.

    git log –oneline -3 to display first three commits


Additional Information:

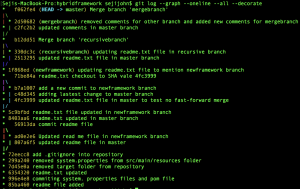
This is one command in Git using which we can get a graphical representation of all branching and merge that we did. Use the command git log --graph --oneline --all --decorate.

Graphical representation of all branching and merging

With this, we came to an end on few important features of Git. Keep following the blog and hope you were able to follow most of it. Until next post, Happy Learning!

Part 1: Working with Git…

Our next task is to upload our Hybrid Framework project into a local repository using Git and then publish our Git repository in a web-based Git called GitHub.

The question that normally comes when working with Git and GitHub – what is the difference between them?

Git is a version control system that stores data or code more like a set of snapshots of a miniature filesystem. Every time we commit or save the state of our project in Git, it basically takes a picture of what all our files look like at that moment and stores a reference to that snapshot. When we commit changes, it stores locally and if we push the commit, it also stores them remotely (if remote Git repository is set up). When setting remotely, Git act as Distributed Version Control System.

GitHub is a web-based Git. Its mostly used for code and offers all of the Distributed Version Control and Source Code Management functionalities of Git along with some added features. We will discuss more on it in later posts.

In this post, we will do a source version control of our Hybrid Framework project using Git and then learn some branching and merging techniques.

Download and Install Git

    1. Our first step is to download and install Git on our machine. To download Git, click git-scm downloads link to go to downloads page directly. Download the required files based on Mac/Windows/Linux machine. Mac installation is pretty easy and we just need to follow the prompts. We will use Terminal program in Mac for writing Git commands. For Windows, make sure that default options are selected. Git Bash is used in Windows for writing the Git commands.
    2. To check if Git is successfully installed on our machine, open Terminal/Command prompt and type in below commands.
      which git
      git --version
      

      Mac Terminal
    3. Next step is to do some configurations. Git can be configured at System level, User level, and Project level. Use below commands to do configurations at different levels.
      // System Level
      git config --system
      
      // User Level
      git config --global
      
      //Project Level
      git config
      
    4. Here in our case, we will be setting some user-level configurations like setting up the user name, email etc..
      // Configuring name, email
      git config --global user.name "Your name"
      git config --global user.email "Your email"
      
      // Some additional configurations
      // Configuring core editor in Mac
      git config --global core.editor "vim -wl1"
      
      // Configuring core editor in Windows
      git config --global core.editor "notepad.exe -wl1"
      
      // Turning on the different color options in the editor
      git config --global color.ui true
      
      // To list out all configurations
      git config --list
      
      // To view the configurations in .gitconfig file present in user directory
      cat .gitconfig
      
      Git configurations

      .gitconfig file configured at user level
    5. Windows already has auto completion feature but in Mac, we have to install the auto-completion feature. This is optional but it will help if we are working with Mac. There are three steps involved in adding this feature – first, download the file from GitHub, rename the filename by adding “.” and then add it to “.bash_profile” file by adding few lines of code. Once auto-completion is installed, we can type in Git and type any character like ‘h’ and hit tab to auto-complete the command. Here it will open up Git help.
      // Get the auto completion file from GitHub
      curl -OL https://github.com/git/git/raw/master/contrib/completion/git-completion.bash
      
      // Rename the git-completion.bash file to .git-completion.bash file
      mv ~/git-completion.bash ~/.git-completion.bash
      
      // Edit the .bash_profile file with below code
      vim .bash_profile
      
      // Type "i" to insert, to save hit Escape, type in: “:wq + Enter” the vim editor
      // Type in below code
      if
      [ -f ~/.git-completion.bash ]; then
      source ~/.git-completion.bash
      fi
      
      
    6. Once Git is installed and configured, out next task is to initialize our project. For initializing we will use Git init command inside the project folder. Here we will be initializing our Hybrid Framework project.
      // First step is to go project folder
      cd documents/workspace/HybridFramework
      
      // Initialize Hybrid Framework project by using below command
      git init
      

      After successful initialization we will see as below and also a separate .git folder will be created inside our project folder. This .git folder will have all of our tracking information of our project. The .git folder contains many files and folders like HEAD, Config, description, refs etc..

      Git init
    7. Now that our project is initialized, our next task is to do a first commit.

      Project folder with newly added readme text file
    8. To commit, first, we need to add all changes done in the present working directory by using the command git add .. Note that ‘.’ in the command refer to the current working directory. This is followed by command git commit -m "first commit". Here -m refers to the message that we want to share on the commit.

      All our files successfully committed
    9. To view the details of all commits, use the command git log.

      Git log command to view details of all commits
    10. To view the current status of our project, use the command git status. This shows the current status of our working directory, staging index and repository. Note Git follows a three-tier architecture – Working Directory, Staging Index, and Repository. In below screenshot note that the files in red are in the working directory and not moved to the staging area. The same files are added to staging index (files in green color) after executing the command git add. After commit, the files are moved to Repository.

      git status
    11. There are few more commonly used commands in git.
      // To view Head is pointing to which branch
      // If HEAD is pointing to last commit of master branch 
      cat .git/HEAD  --> Shows ref: refs/heads/master
      
      // To view the hash value of last commit in master branch
      // Below command will display the hash value of the last commit in master branch
      cat .git/refs/heads/master --> Shows a hash value like '72eecc8707d97c874dd06aca5ad5198563fefcff'
      
      // For Add/Edit files 
      git add
      git commit -m "Added/Edited files"
      
      // For finding changes between files or compare two files
      // This command compares the files in repository that head is pointing at to those present in working directory 
      git diff
      
      // Compare two files between staging index and those present in repository
      git diff --staged
      
      // Delete files from repository
      // This will remove the file from the repository as well as from working directory.
      git rm filenames
      git commit -m "Deleted files"
      
      // Renaming files
      // This will rename the file from the repository as well as from working directory.
      git mv oldnamefile newfilename
      git commit -m "Renaming files"
      
      // Adding and committing to repository in one step
      git commit -am "adding committing files in one step"
      
      // Undo changes in current working directory. Checkouts the file from repository to working directory
      // -- means stay on current branch
      git checkout -- filename
      
      // Undo changes from staging to working directory or to unstage
      git reset HEAD filename
      
      // Undo changes to last commit in repository. First add it staging and then amend to last commit
      git add filename
      git commit --amend -m "adding to last commit"
      
      // Checkout from a particular commit or retrieving old version
      // Checks out the file into staging
      git checkout shavalue -- filename
      
      // Reset to a particular version can be done by resetting the head
      // --soft Does not touch the staging index file or the working directory at all but resets the head in repository
      git reset --soft shavalue
      
      // --mixed Resets the staging index and repository but not the working directory 
      git reset --mixed shavalue
      
      // --hard Resets the staging index, working directory and repository
      git reset --hard shavalue
      
      // To permanently remove untracked files from working directory
      git clean -f
      git clean -n
      
      // To permanently remove a folder from repository
      git rm -r --cached FolderName
      git commit -m "Removed folder from repository"
      
    12. Till now we have seen Git identifies any changes to our project. However, sometimes we don’t want Git to identify some files like the log files or compiled source codes to be included in our repository. For such cases, we will create a .gitignore file. This file will contain the list of files that need to be ignored. In Windows, we can directly create a text file and name it as .gitignore and save as all files in the project directory. For Mac, we will use a text editor from Terminal to create a .gitignore file inside our project folder.
    13. To create a .gitignore file in Mac, follow below instructions:
      1. Open Terminal and navigate to Project folder.
      2. Type in nano .gitignore
      3. Nono editor opens up in the Terminal
      4. Here we are creating .gitignore file specific to HybridFramework project. We will be ignoring 'Target', 'RESULT_LOG', 'Screenshots', 'test-output' folders as displayed in below screenshot.
      5. Hit Cntrl + X, Y, Return to save the .gitignore file inside project folder.
      

      .gitignore file opened in nano editor
    14. One point to remember that the rules in our .gitignore file only apply to untracked files. Since ‘target’ folder and ‘system.properties’ files are already committed in our repository, first, we have to unstage them and then create a commit in order for the .gitignore file to ignore the directories from the staging index.
      // Remove files from staging index
      git rm -r --cached target
      git rm -r --cached src/main/resources/system.properties
      git commit -m "Removed target and system.properties file"
      
    15. Once .gitignore file saved and target’ folder and ‘system.properties’ files unstaged, we will see only .gitignore file as an untracked file. Remember to store the  .gitignore file in repository.
      .gitignore in working directory
      // To add .gitignore into repository
      git add .gitignore
      git commit -m "Adding .gitignore into repository"
      

In the next post, we will concentrate more on the branching and merging techniques using Git and we will view how its reflected in Eclipse. Till then Happy Learning!


Part 5: Hybrid Framework Development…

This is the final post on Hybrid Framework Development. Here we will focus on different reports and logs that will be created after running our test.

  • Before running our test, our ‘HybridFramework’ project structure will be displayed as below.

    HybridFramework Project Structure
  • We have 3 source folders, JRE System Library and Maven Dependencies, src and target folder, pom.xml file in our project.
  • Here we will execute using Chrome browser. For that we just need to update the property <selenium.browser>CHROME</selenium.browser> inside our pom.xml file.
  • After updating the pom.xml file, we have to ensure that the properties are updated in system.properties file inside ‘src/main/resources‘ source folder. Right click on ‘HybridFramework’ project and select Maven -> Update Project as displayed below.

    Update Project
  • After successful update, we can verify the same in system.properties file.

    system.properties file
  • Next task is to execute our test. Right click on ‘HybridFramework’ project and click Run As -> Maven Test.
  • The test gets successfully completed and we can see that two tests are executed. The Logs are printed in console as well as in a log file.

    System Console
  • Refresh the project once we can see three more folders are created – RESULT_LOG, Screenshots, and test-output.

    Output folders
  • The RESULT_LOG folder contains the Extent Report. As displayed below this HTML report has all the actions captured. Also as we coded in the action methods, screenshots are attached too. This report not only looks good but also share vital information of our test.

    Extent Report
  • The Screenshots folder stores all captured screenshots inside the project folder. This framework also ensures that the folders and reports are created based on execution date.

    Reported created based on execution date
  • The test-output folder contains not only the regular TestNG reports but also the log file of our execution. If we execute as Maven Test, the test-output folder will contain only the log file. Notice that we configured the log folder name and the log file name inside Log4j.xml.

    Log file creation
  • The log file once opened will be displayed as below. Notice that it will capture all the log information as we coded inside Page Objects.

    Sample of log file


With this, we completed our Hybrid Framework Development. This framework can be successfully implemented for web-based projects that are planning to move from manual QA to Automation QA. This framework takes a modular approach and is very easy to maintain. Apart from that it also creates wonderful reports that can be shared across different teams.

In coming posts, we will cover on how to upload our project into a repository and then execute using CI tool. Sounds interesting, right?

Well, for that you need to keep following. Till then, Happy Learning!

The complete project is available on GitHub in below location:
https://github.com/autotestmadness/HybridFramework

Part 4: Hybrid Framework Development…

This post is the continuation of Hybrid Framework Development. For a complete understanding of Hybrid Framework Development, please go through the previous posts on Hybrid Framework Development.

Part 1: Hybrid Framework Development…
Part 2: Hybrid Framework Development…
Part 3: Hybrid Framework Development…

In this post, we will be creating a TestNG script. We will create two tests, although the flow is same we will use a different set of test data.

First Test Case: Navigate to New Tours application and perform a successful login. Search for a one-way flight departing from London on 7th.

Second Test Case: Navigate to New Tours application and perform a successful login. Search for a one-way flight departing from Paris on 10th.

  • Right click on the ‘src/test/java‘ folder and click New -> Package. Name the package as ‘com.testmadness.testcase’ and click Finish to close the window.
  • Inside ‘com.testmadness.testcase’ package, we will place our TestNG class. Right click on ‘com.testmadness.testcase’ package and select TestNG -> Create TestNG class. Name the class as ‘BookFlightTest.java’. Copy the below code into ‘BasePage.java’ file.
    package com.testmadness.testcase;
    
    import org.testng.annotations.Test;
    import com.testmadness.pages.HomePage;
    import com.testmadness.utils.Config;
    import com.testmadness.utils.Constants;
    import com.testmadness.utils.ExcelUtil;
    import com.testmadness.utils.Log;
    import com.testmadness.utils.Reports;
    import org.testng.annotations.BeforeMethod;
    import java.lang.reflect.Method;
    import org.apache.log4j.xml.DOMConfigurator;
    import org.openqa.selenium.WebDriver;
    import org.testng.annotations.AfterMethod;
    import org.testng.annotations.BeforeClass;
    
    public class BookFlightTest {
    	WebDriver driver;
    	HomePage homePage;
    	Reports report;
    	
      // First Test Case	
      @Test
      public void firstTestCase() {
    	  homePage = new HomePage(driver);
    	  try {
    		homePage.navigateToURL(ExcelUtil.getCellData(1, 1));
    		homePage.loginUser(ExcelUtil.getCellData(1, 2), ExcelUtil.getCellData(1, 3)).findFlights(ExcelUtil.getCellData(1, 4), ExcelUtil.getCellData(1, 5));
    	} catch (Exception e) {
    		e.printStackTrace();
    	} 
      }
      
      //Second Test Case	 
      @Test
      public void secondTestCase() {
    	  homePage = new HomePage(driver);
    	  try{
    		  homePage.navigateToURL(ExcelUtil.getCellData(2, 1));
    		  homePage.loginUser(ExcelUtil.getCellData(2, 2), ExcelUtil.getCellData(2, 3)).findFlights(ExcelUtil.getCellData(2, 4), ExcelUtil.getCellData(2, 5));
    	  }catch (Exception e) {
    			e.printStackTrace();
    		}  
      }
      
      // Before Method to start logging
      @BeforeMethod
      public void beforeMethod(Method method) {
    	  
              // Passing the test case method name
    	  Log.startTestCase(method.getName());
    	  report.startTest(method.getName());
    	  System.out.println(Config.getProp().getProperty("selenium.browser")); 
      }
      
      // After Method to end logging
      @AfterMethod
      public void afterMethod() {
    	    homePage.endTest();
    	    homePage.endReport();
    	    Log.endTestCase("firstTestCase");
    	  
      }
      
      //Before Class to initialize Log4j
      @BeforeClass
      public void beforeClass() {
    	    System.setProperty(Config.getProp().getProperty("logfoldername"), Constants.logFolderName);
    	    System.setProperty(Config.getProp().getProperty("logfilename"), Constants.logFileName);
    	    DOMConfigurator.configure("src/main/java/com/testmadness/utils/log4j.xml");
    	    try {
    		   ExcelUtil.setExcelFile(Constants.PATH_DATA, "Sheet1");
    		} catch (Exception e) {
    		   e.printStackTrace();
    		}
    		 report = new Reports();
    	}	
    }
    
  • In the above code we have used two ‘@Test’ methods for our two test cases. We have set the path of our test data sheet and completed the Log4j configuration in ‘@BeforeClass’ method. In ‘@BeforeMethod’ we started the Extent Report and Log4j logging. In ‘@AfterMethod’, we stopped the logging as well as closed the test.
  • After successful completion till here, our project will look like as displayed below.

    ‘src/test/java’ folder
  • We can create as many as test scripts using TestNG class. More details are on Part 1: Scripting using TestNG….

With this we completed the scripting part inside our Hybrid Framework. We automated two test cases. In the next post we will go through the reporting and logging which is going to be an interesting topic. Till then, Happy Learning!


Part 3: Hybrid Framework Development…

This post is a continuation of Part 1: Hybrid Framework Development… and Part 2: Hybrid Framework Development…

Here we will mainly focus on creating Page Objects of our Demo website as well as use the Page Factory concepts.

For better understanding, please go through the following posts:

Part 1: Page Object Model…
Part 2: Page Object Model…
Working with Page Factory…

  • Our first task is to create a Base class. This Base class will have common methods that will be used in all our Page Object classes. Right click on the ‘src/main/java‘ folder and click New -> Package. Name the package as ‘com.testmadness.base’ and click Finish to close the window.
  • Inside ‘com.testmadness.base’ package, we will place our Base class. Right click on ‘com.testmadness.utils’ package and select New -> Class. Name the class as ‘BasePage.java’. Copy the below code into ‘BasePage.java’ file.
    package com.testmadness.base;
    
    import java.io.File;
    import java.util.HashMap;
    import java.util.Map;
    import java.util.concurrent.TimeUnit;
    import org.apache.commons.io.FileUtils;
    import org.openqa.selenium.NoSuchElementException;
    import org.openqa.selenium.OutputType;
    import org.openqa.selenium.TakesScreenshot;
    import org.openqa.selenium.WebDriver;
    import org.openqa.selenium.WebElement;
    import org.openqa.selenium.chrome.ChromeDriver;
    import org.openqa.selenium.chrome.ChromeOptions;
    import org.openqa.selenium.firefox.FirefoxDriver;
    import org.openqa.selenium.safari.SafariDriver;
    import org.openqa.selenium.support.PageFactory;
    import org.openqa.selenium.support.ui.ExpectedConditions;
    import org.openqa.selenium.support.ui.Select;
    import org.openqa.selenium.support.ui.WebDriverWait;
    import com.relevantcodes.extentreports.LogStatus;
    import com.testmadness.utils.Config;
    import com.testmadness.utils.Constants;
    import com.testmadness.utils.Log;
    import com.testmadness.utils.Reports;
    
    public class BasePage {
    	
    	public WebDriver driver;
    	private static final int pageElementLoadWait = 30;
    	private static final int pageTimeOutWait = 20;
    	public Reports report = new Reports();
    	public static HashMap<WebElement, String> elementDetails = new HashMap<WebElement, String>();
    	
    	public BasePage(WebDriver driver){
    	    this.driver = driver;
    		if(driver==null){
    			driver = getDriver();	
    		}
    		//Initialize Page Factory. Passing child object
    		PageFactory.initElements(driver, this);
    		Log.info("Page Factory initialized");
    		
    	}
    	
            // Driver Initialization
    	public WebDriver getDriver(){
    		
    		String browser = Config.getProp().getProperty("selenium.browser");
    		
    		if(browser.equals("SAFARI")){
    			System.setProperty("webdriver.safari.driver", Config.getProp().getProperty("webdriver.safari.driver"));
    			driver = new SafariDriver();
    			driver.manage().window().maximize();
    		}
    		else if(browser.equals("FIREFOX")){
    			System.setProperty("webdriver.gecko.driver", Config.getProp().getProperty("webdriver.firefox.driver"));
    			driver = new FirefoxDriver();
    			driver.manage().window().maximize();
    			driver.manage().timeouts().implicitlyWait(pageTimeOutWait, TimeUnit.SECONDS);
    		}
    		else if(browser.equals("CHROME")){
    			System.setProperty("webdriver.chrome.driver", Config.getProp().getProperty("webdriver.chrome.driver"));
    			ChromeOptions options = new ChromeOptions();
    			options.addArguments("--start-maximized");
    			options.addArguments("--disable-web-security");
    			options.addArguments("--no-proxy-server");
    			Map<String, Object> prefs = new HashMap<String, Object>();
    			prefs.put("credentials_enable_service", false);
    			prefs.put("profile.password_manager_enabled", false);
    			options.setExperimentalOption("prefs", prefs);
    			driver = new ChromeDriver(options);
    			driver.manage().timeouts().implicitlyWait(pageTimeOutWait, TimeUnit.SECONDS);
    		}
    		
    //Setting page load time out		driver.manage().timeouts().pageLoadTimeout(pageTimeOutWait, TimeUnit.SECONDS);
    		return driver;
    	}
    	
    	// Wait for Element to be clickable
    	public WebElement waitForElement(WebElement element) {
    		try{
    			WebDriverWait wait = new WebDriverWait(driver, pageElementLoadWait);
    			wait.until(ExpectedConditions.elementToBeClickable(element));
    			Log.info("Wait for element "+ elementDetails.get(element));
    			return element;
    		}catch(Exception e){
    			
    		}
    		return null;
    	}
    	
    	// Navigate to URL
    	public void navigateToURL(String siteURL) {
    		driver.navigate().to(siteURL);
    		report.logStatus(LogStatus.PASS, "OpenBrowser: " + Config.getProp().getProperty("selenium.browser") + "," + siteURL,
    				"Passed");
    		Log.info("Demo URL Launched");
    	}
    	
    	// Take a screenshot
    	public void takeScreenShot(String fileName) {
    		try {
    			File screenshot = ((TakesScreenshot) driver).getScreenshotAs(OutputType.FILE);
    			FileUtils.copyFile(screenshot, new File(Constants.sScreenshotFilepath + fileName + ".jpeg"));
    			Log.info("Screenshot captured");
    		} catch (Exception e) {
    			System.out.println(e.getMessage());
    			Log.info("Screenshot exception");
    		}
    	}
    	
    	// End Extent Reporting
    	public void endReport() {
    		report.endTest();
    	}
    	
    	// End a Test
    	public void endTest() {
    		driver.close();
    		driver.quit();
    	}
    	
    	/*Click Element method.
    	This method will log in Extent Report as well in Log4j.*/
    	public boolean clickElement(WebElement element) {
    		try {
    			element = waitForElement(element);
    			if (element != null) {
    				takeScreenShot(elementDetails.get(element));
    				report.logStatus(LogStatus.PASS, "Click",
    						"Click " + elementDetails.get(element) + " Success");
    				report.screenshotLog(LogStatus.PASS, "Click Success " + elementDetails.get(element),
    						Constants.sScreenshotFilepath + elementDetails.get(element) + ".jpeg");
    				Log.info("Element Clicked: "+elementDetails.get(element));
    				element.click();
    				return true;
    			}
    			else
    				throw new NoSuchElementException("Element not found");
    		} catch (Exception e) {
    			takeScreenShot("Fail_" + Constants.dateTag);
    			report.screenshotLog(LogStatus.FAIL, "Click Failed ",
    					Constants.sScreenshotFilepath + "Fail_" + Constants.dateTag + ".jpeg");
    			Log.info("Element Click Exception");
    			report.endTest();
    			throw new NoSuchElementException("Element not found");
    		}
    	}
    	
    	/*Enter text in text box method.
    	This method will log in Extent Report as well in Log4j.*/
    	public boolean EnterText(WebElement element, String input) {
    		try {
    			element = waitForElement(element);
    			if (element != null) {
    				element.sendKeys(input);
    				report.logStatus(LogStatus.PASS, "Enter Text",
    						"Enter Text into " + elementDetails.get(element) + " Success");
    				Log.info("Enter text: " + elementDetails.get(element));
    				return true;
    			}else
    				throw new NoSuchElementException("Element not found");
    		} catch (Exception e) {
    			takeScreenShot("Fail_" + Constants.dateTag);
    			report.screenshotLog(LogStatus.FAIL, "Enter Text",
    					Constants.sScreenshotFilepath + "Fail_" + Constants.dateTag + ".jpeg");
    			Log.info("Enter text Exception");
    			throw new NoSuchElementException("Element not found");
    		}	
    	}
    	
    	/*Select a value from drop down by text method.
    	This method will log in Extent Report as well in Log4j.*/
    	public boolean SelectElementByText(WebElement element, String input) {
    		try {
    			element = waitForElement(element);
    			if (element != null) {
    				Select dropdown = new Select(element);
    				dropdown.selectByVisibleText(input);
    				report.logStatus(LogStatus.PASS, "Select Element", "Select Element For " + elementDetails.get(element)
    						+ " Success");
    				Log.info("Select element: " + elementDetails.get(element));
    				return true;
    			}else
    				throw new NoSuchElementException("Element not found");
    		} catch (Exception e) {
    			takeScreenShot("Fail_" + Constants.dateTag);
    			report.screenshotLog(LogStatus.FAIL, "Select Element",
    					Constants.sScreenshotFilepath + "Fail_" + Constants.dateTag + ".jpeg");
    			Log.info("Select element Exception ");
    			throw new NoSuchElementException("Element not found");
    		}
    	}
    }
    
  • The above ‘BasePage’ class file has a constructor which creates an instance of the Page Object using ‘PageFactory’ class. It also has a method to initialize the required WebDriver, wait for an element to be clickable, navigate to an URL, take a screenshot and end the test. It also contains different action methods like clicking a web element, entering a text in a text box, selecting a value from a drop down. The action methods not only completes an action on a web element but also logs the information in the report and log file. Notice that we are declaring a HashMap (Collection in Java) public static HashMap<WebElement, String> elementDetails = new HashMap<WebElement, String>(); to store and name the web elements. We will use it to name the screenshot images.
  • Next task is to create Page Objects. Here we will create two Page Objects. This is similar to what we covered in Part 1: Page Object Model…. Right click on the ‘src/main/java‘ folder and click New -> Package. Name the package as ‘com.testmadness.pages’ and click Finish to close the window. Inside ‘com.testmadness.pages’ package, we will place our Page Objects.
  • Right click on ‘com.selenium.pages’ package and click New -> Class. Name the class as ‘HomePage.java’. This ‘HomePage’ class will extend our ‘BasePage’ class. In this class, we will place all the Home Page element locators and methods. Click Finish to close the window. Copy and paste below code into ‘HomePage’ class.
    package com.testmadness.pages;
    
    import org.openqa.selenium.WebDriver;
    import org.openqa.selenium.WebElement;
    import org.openqa.selenium.support.FindBy;
    import com.testmadness.base.BasePage;
    import com.testmadness.utils.Log;
    
    public class HomePage extends BasePage {
    	
    	
    	public HomePage(WebDriver driver) {
    		super(driver);
    		
    	}
    
    	// Element Locators for username textbox
    	@FindBy(name = "userName")
    	private WebElement userName;
    	public WebElement getUserName(){
    		try{
                            // Store and name the web element into HashMap
    			elementDetails.put(userName, "User Name text box");
    		}catch(Exception e){
    			
    		}
    		return userName;
    	}
    
    	// Element Locators for password textbox
    	@FindBy(name = "password")
    	private WebElement password;
    	public WebElement getPassword(){
    		try{
                            // Store and name the web element into HashMap
    			elementDetails.put(password, "Password text box");
    		}catch(Exception e){
    			
    		}
    		return password;
    	}
    
    	// Element Locators for login button
    	@FindBy(xpath = "//input[@name='login']")
    	private WebElement login;
    	public WebElement getLogin(){
    		try{
                            // Store and name the web element into HashMap
    			elementDetails.put(login, "Login button");
    		}catch(Exception e){
    			
    		}
    		return login;
    	}
    
    	// Login method. Notice there is no return type
    	public FlightFinderPage loginUser(String uname, String pwd) {
    		// Enter username
    		EnterText(getUserName(), uname);
    		// Log4j logging
    		Log.info("HomePage.loginUser - username entered");
    
    		// Enter password
    		EnterText(getPassword(), pwd);
    		// Log4j logging
    		Log.info("HomePage.loginUser - password entered");
    
    		// Click Login button
    		clickElement(getLogin());
    		// Log4j logging
    		Log.info("HomePage.loginUser - login button clicked");
    	
                    // Returns an object of FlightFinderPage class
    		return new FlightFinderPage(driver);
    	}
    }
    
  • We will create one more Page Object. Right click on ‘com.selenium.pages’ package and click New -> Class. Name the class as ‘FlightFinderPage.java’. All our Page Object will extend the ‘BasePage’ class. Copy and paste below code into ‘FlightFinderPage’ class.
    package com.testmadness.pages;
    
    import org.openqa.selenium.WebDriver;
    import org.openqa.selenium.WebElement;
    import org.openqa.selenium.support.FindBy;
    import com.testmadness.base.BasePage;
    import com.testmadness.utils.Log;
    
    
    public class FlightFinderPage extends BasePage {
    
    	public FlightFinderPage(WebDriver driver) {
    		super(driver);
    	}
    
    	//Element Locators for one way radio button
    	@FindBy(xpath = "//input[@value='oneway']")
    	private WebElement onewayRadio;
    
    	public WebElement getOneWayRadio() {
    		try {
                            // Store and name the web element into HashMap
    			elementDetails.put(onewayRadio, "One Way radio button");
    		} catch (Exception e) {
    
    		}
    		return onewayRadio;
    	}
    	
    	//Select the location from dropdown
    	@FindBy(name = "fromPort")
    	private WebElement fromPortDrop;
    	public WebElement getFromPortDrop(){
    		try{
                            // Store and name the web element into HashMap
    			elementDetails.put(fromPortDrop, "From Port drop down");
    		}catch (Exception e) {
    
    		}	
    		return fromPortDrop;
    	}
    	
    	//Select the day from dropdown
    	@FindBy(xpath = "//select[@name='fromDay']")
    	private WebElement fromDayDrop;
    	public WebElement getFromDayDrop(){
    		try{
                            // Store and name the web element into HashMap
    			elementDetails.put(fromDayDrop, "From Day drop down");
    		}catch (Exception e) {
    
    		}
    		return fromDayDrop;
    	}
    	
    	//Click Business radio button
    	@FindBy(xpath = "//input[@value='Business']")
    	private WebElement businessRadio;
    	public WebElement getBusinessRadio(){
    		try{
                            // Store and name the web element into HashMap
    			elementDetails.put(businessRadio, "Business radio button");
    		}catch (Exception e) {
    
    		}
    		return businessRadio;
    	}
    	
    	//Click find flights button
    	@FindBy(name = "findFlights")
    	private WebElement findFlightsButton;
    	public WebElement getFindFlightsButton(){
    		try{
                            // Store and name the web element into HashMap
    			elementDetails.put(findFlightsButton, "Find Flights button");
    		}catch (Exception e) {
    
    		}
    		return findFlightsButton;
    	}
    
    
    	//Find Flights method. Notice there is no return type
    	public void findFlights(String departFrom, String departDate) {
    		// Click one way radio button
    		clickElement(getOneWayRadio());
    		Log.info("FlightFinderPage.findFlights - One way Radio Button clicked");
    		// Select Departing From dropdown
    		SelectElementByText(getFromPortDrop(), departFrom);
    		Log.info("FlightFinderPage.findFlights - Depart From Dropdown clicked");
    
    		// Select Departing Day dropdown
    		SelectElementByText(getFromDayDrop(), departDate);
    		Log.info("FlightFinderPage.findFlights - Depart Date Dropdown clicked");
    
    		// Click business class
    		clickElement(getBusinessRadio());
    		Log.info("FlightFinderPage.findFlights - Business Radio Button clicked");
    
    		// Click Find Flights button
    		clickElement(getFindFlightsButton());
    		Log.info("FlightFinderPage.findFlights - Find Flights Button clicked");
    
    	}
    
    }
    
  • Our next task is to add the data sheet using which we will input the test data to our test scripts. We will take the same approach as we did in Data Driven Framework Development….
  • Right click on the ‘src/main/java‘ folder and click New -> Package. Name the package as ‘com.testmadness.data’ and click Finish to close the window. Inside the ‘com.testmadness.data’ package, we will place our test data file in ‘xlsx’ format. Always remember to format all cells in the excel sheet to text format. Our test data sheet will look as displayed below.

    Data.xlsx file for storing test data
  • This is how our ‘src/main/java‘ folder look like once we reach here.

    ‘src/main/java’ folder

With this, we have completed the creation of Page Objects. Here we created only two Page Objects. Best practice is to create one Page Object per page in the test application.

In the next post, we will be creating actual scripts in our Hybrid Framework. Till then, Happy Learning!

Part 2: Hybrid Framework Development…

In Part 1: Hybrid Framework Development…, we have created overall structure of our framework. Our next step is to create source codes inside our project. Here also we will take a step by step approach in creating the source code.

  • First, delete the unwanted packages from the ‘src/main/java‘ and ‘src/test/java’ folders. Remember, Maven by default creates some test classes. In our case, we don’t need them as we will be creating our own.
  • Right click on the ‘src/main/java‘ folder and click New -> Package. Name the package as ‘com.testmadness.utils’ and click Finish to close the window.
  • Inside ‘com.testmadness.utils’ package, we will place all the utility classes which are basically common classes and not project specific. For example, we need some class for the Log4j, Extent Reports, accessing the property file etc..
  • First of all, we will create a ‘Constants.java’ file to store all the constant values. Right click on ‘com.testmadness.utils’ package and select New -> Class. Name the class as ‘Constants.java’. Copy the below code into ‘Constants.java’ file. In this class, we will be storing different constants that will be referred from different classes. Notice that all our constants are static variables.
    package com.testmadness.utils;
    
    import java.text.SimpleDateFormat;
    import java.util.Date;
    
    public class Constants {
    
    	// TestResults folder location
    	public static final String PATH_RESULTS = System.getProperty("user.dir") + "/TestResults/";
    
    	// Test Data Excel location
    	public static final String PATH_DATA = System.getProperty("user.dir") + "/src/main/java/com/testmadness/data/Data.xlsx";
    
    	// Test Data Excel Sheet name
    	public static final String SHEETNAME = "Sheet1";
    
    	// Test Data Excel File Name
    	public static final String FILE_NAME = "TestData.xlsx";
    
    	// Property file name
    	public static final String PROP_NAME = "system.properties";
    
    	// Property file location
    	public static final String PROP_LOCATION = "src/main/resources";
    
    	public static Date date = new Date();
    	public static SimpleDateFormat reportDate = new SimpleDateFormat("MM-dd-yyyy hh-mm-ss");
    	
    	//Log Files Constants
    	
    	public static String logFileName = "LOG_"+reportDate.format(date);
    	public static String dateTag = reportDate.format(date);
    	public static String logFolderName = "LOG_FOLDER_"+reportDate.format(date);
    
    	// Extent Report constants
    	public static final String filePath = System.getProperty("user.dir");
    	public static final String reportPath = filePath + "/RESULT_LOG";
    	public static final String imagePath = filePath + "/IMAGES";
    
    	public static final String reportFileName = reportPath + "/" + "TESTREPORT_" + reportDate.format(date) + "TC.html";
    	public static final String screenshotFileName = reportPath + "/SCREENSHOTS" + "TESTREPORT_"
    			+ reportDate.format(date) + "TC.html";
    	public static final String screenshotFilePath = screenshotFileName + "/SCREENSHOTS" + "TEST"
    			+ reportDate.format(date) + "/";
    	public static String sScreenshotFilepath = filePath + "/Screenshots/" + "IOLS_Screenshot_" + reportDate.format(date)
    			+ "/";
    	public static String sReportFileName = reportPath + "/" + "IOLSTestReport_" + reportDate.format(date) + ".html";
    
    }
    
  • Next, we will create a class to access the property file. Right click on ‘com.testmadness.utils’ package and select New -> Class. Name the class as ‘Config.java’. Copy the below code into ‘Config.java’ file.
    package com.testmadness.utils;
    
    import java.io.File;
    import java.io.FileInputStream;
    import java.io.InputStream;
    import java.util.Properties;
    
    public class Config {
    
    	private static Properties prop;
    	public static Properties getProp() {
    		if (prop == null) {
    			prop = new Properties();
    			InputStream input = null;
    			try {
    				//Two arguments passed for property file location
    				input = new FileInputStream(new File(Constants.PROP_LOCATION, Constants.PROP_NAME));
    				prop.load(input);
    			} catch (Exception e) {
    				e.printStackTrace();
    			}
    		}
    		return prop;
    	}
    }
    
  • Next, we will create Log class and log4j.xml files. We can directly copy the codes from Working with Log4j logging…. We need only codes from’Log.java‘ and ‘log4j.xml‘ files. Notice that both these files will be placed inside ‘com.testmadness.utils’ package. However ‘log4j.xml‘ file has small changes in order to get the log folder and log files names. Copy the below code and copy in ‘log4j.xml‘ file.
    <?xml version="1.0" encoding="UTF-8" ?>
    <!DOCTYPE log4j:configuration SYSTEM "log4j.dtd">
    <log4j:configuration xmlns:log4j='http://jakarta.apache.org/log4j/'>
    	<!-- Appender for printing in console -->
    	<appender name="console" class="org.apache.log4j.ConsoleAppender">
    		<layout class="org.apache.log4j.PatternLayout">
    		    <!-- %d{yyyy-MM-dd HH:mm:ss} refers to Date format 2017-03-23 15:54:44 INFO  Log:15 -->
    		    <!-- %-5p refers to Type of logging INFO-->
    		    <!-- %c{1}  -->
    			<param name="ConversionPattern" value="%d{yyyy-MM-dd HH:mm:ss} %-5p %c{1}:%L - %m%n" />
    		</layout>
    	</appender>
    	<!-- Appender for printing in file -->
    	<appender name="file" class="org.apache.log4j.RollingFileAppender">
    		<!-- Appending false -->
    		<param name="append" value="false" />
    		<!-- Maximum 10kb size. New file will be created and old file renamed -->
    		<param name="maxFileSize" value="10KB" />
    		<!-- Maximum 5 log files. Old ones will be deleted -->
    		<param name="maxBackupIndex" value="5" />
    		<!-- Location of log file -->
    		<param name="file" value="test-output/log/${logfoldername}/${logfilename}.log" />
    		<layout class="org.apache.log4j.PatternLayout">
    			<param name="ConversionPattern" value="%d{yyyy-MM-dd HH:mm:ss} %-5p %c{1}:%L - %m%n" />
    		</layout>
    	</appender>
    
    
    	<root>
    	<!-- Setting Logging level  -->
    		<level value="info" />
    		<!-- Setting logging level for console -->
    		<appender-ref ref="console" />
    		<!-- Setting logging level for file -->
    		<appender-ref ref="file" />
    	</root>
    </log4j:configuration>
    
  • For advanced HTML reports, we will use Extent Reports. Right click on ‘com.testmadness.utils’ package and select New -> Class. Name the class as ‘Reports.java’. Copy the code from Advanced HTML Reports… post. However, a small update can be made on the Report location as we can refer the path already mentioned in our Constants.class.
  • Our next task is to create a ‘ExcelUtil.class’ inside ‘com.testmadness.utils’ package. This class will help us to access the test data entered in an Excel sheet. Copy the code of ExcelUtil.class’ from Data Driven Framework Development… post.
  • So far our ‘com.testmadness.utils’ package has classes for accessing property file, Log4j, Excel sheet, Constants and for generating HTML reports.
  • The final structure of ‘com.testmadness.utils’ package will look like as displayed below.

    com.testmadness.www package


In the next post, we will focus mainly on creating Page based objects. So stay tuned!

Part 1: Hybrid Framework Development…

So far we have covered multiple topics in Selenium Automation. And the good thing is that we are going to use most of the topics covered into the creation of our Hybrid Framework. Sounds interesting, right?

What all functionality our Hybrid Framework will contain?

  • First and foremost it will be a Maven project. We will not download individual jars as we did earlier, rather we will add dependencies in our pom.xml file.
  • And of course, it will a Selenium, TestNG project.
  • We will include like Page Object Modeling, Page Factory concepts in our framework.
  • We will add Data Driven technique in our framework for test data input.
  • The framework will have Log4j logging.
  • In addition to TestNG reports, we will also include Extent Reports for advanced HTML reports.
  • We will create user defined methods for different actions.
  • And we will also add a new topic in our Hybrid Framework and that is the use of properties file in order to store some configurable parameters of our application.

Setting up this framework will be a long and tiring affair but for sure it’s going to be an interesting one. Our demo application will be New Tours Demo, which we used in our previous posts also.

Hybrid Framework Development:

  • Our first task is to create a Maven project in Eclipse. Go to File -> New -> Project and select Maven and click Next. Use default workspace location and quick-start archetype. Enter a Group ID, in our case its ‘com.testmadness.www’, Artifact ID as ‘HybridFramework’. Click Finish to complete the project creation. Once complete, Maven will automatically create the project structure as displayed below.

    Maven Project
  • Next step is to add the dependencies in our pom.xml file. For that we will need dependencies for Selenium, TestNG, Log4j, Apache POI and Extent Reports. We can get the dependencies either by doing a search in Google or by directly going to Maven Repository website. After successful update, our pom.xml will look as below:
    <project xmlns="http://maven.apache.org/POM/4.0.0" xmlns:xsi="http://www.w3.org/2001/XMLSchema-instance"
    	xsi:schemaLocation="http://maven.apache.org/POM/4.0.0 http://maven.apache.org/xsd/maven-4.0.0.xsd">
    	<modelVersion>4.0.0</modelVersion>
    
    	<groupId>com.testmadness.www</groupId>
    	<artifactId>HybridFramework</artifactId>
    	<version>0.0.1-SNAPSHOT</version>
    	<packaging>jar</packaging>
    	<name>HybridFramework</name>
    	<url>http://maven.apache.org</url>
    
    	<properties>
    		<project.build.sourceEncoding>UTF-8</project.build.sourceEncoding>
    		<maven.compiler.source>1.8</maven.compiler.source>
    		<maven.compiler.target>1.8</maven.compiler.target>
    		<selenium.version>3.4.0</selenium.version>
    		<testng.version>6.10</testng.version>
    		<log4j.version>1.2.17</log4j.version>
    		<extent.version>2.41.2</extent.version>
    		<selenium.browser>CHROME</selenium.browser>	
    <webdriver.safari.driver>/usr/bin/safaridriver</webdriver.safari.driver>
    <webdriver.firefox.driver>/Users/sejijohn/Documents/JARS/geckodriver</webdriver.firefox.driver>		<webdriver.chrome.driver>/Users/sejijohn/Documents/JARS/chromedriver 2</webdriver.chrome.driver>
    		<logfoldername>logfoldername</logfoldername>
    		<logfilename>logfilename</logfilename>
    	</properties>
    
    <build>
        <plugins>
          <plugin>
            <groupId>org.codehaus.mojo</groupId>
            <artifactId>properties-maven-plugin</artifactId>
            <version>1.0.0</version>
            <executions>
              <execution>
                <phase>generate-resources</phase>
                <goals>
                  <goal>write-project-properties</goal>
                </goals>
                <configuration>
                  <outputFile>
                    src/main/resources/system.properties
                  </outputFile>
                </configuration>
              </execution>
            </executions>
          </plugin>
        </plugins>
      </build>
    
    	<dependencies>
    		<dependency>
    			<groupId>org.seleniumhq.selenium</groupId>
    			<artifactId>selenium-java</artifactId>
    			<version>${selenium.version}</version>
    		</dependency>
    		<dependency>
    			<groupId>org.testng</groupId>
    			<artifactId>testng</artifactId>
    			<version>${testng.version}</version>
    		</dependency>
    		<dependency>
    			<groupId>log4j</groupId>
    			<artifactId>log4j</artifactId>
    			<version>${log4j.version}</version>
    		</dependency>
    		<dependency>
    			<groupId>com.relevantcodes</groupId>
    			<artifactId>extentreports</artifactId>
    			<version>${extent.version}</version>
    		</dependency>
                    <dependency>
    			<groupId>org.apache.poi</groupId>
    			<artifactId>poi</artifactId>
    			<version>3.16</version>
    		</dependency>
                    <dependency>
    			<groupId>org.apache.poi</groupId>
    			<artifactId>poi-ooxml</artifactId>
    			<version>3.16</version>
    		</dependency>
    	</dependencies>
    </project>
    

In the above pom.xml file, the first part (represented in pink color) has the project details like, Group ID, Artifact ID which we entered in the initial stage of our project creation. Since we selected default archetype, the packaging is in jar.

The second part (represented in blue color) is where we are setting the properties. If we want to use Java 8 language features (-source 1.8) and also want the compiled classes to be compatible with JVM 1.8 (-target 1.8), we can add the two following two properties, maven.compiler.source, maven.compiler.target with the Java version mentioned in them. The different version properties that we set, for example, selenium.version can be used to set the version of different dependencies inside pom.xml. This is not mandatory as we can directly set the versions in the dependencies. However, by doing this, we can add extra flexibility to directly update the versions from properties rather updating in the dependencies. Other properties such as selenium.browser, webdriver.safari.driver, are used to pass configurable parameters to a .properties file, which we will create shortly. Please make sure to download latest Safari, Chrome, Firefox drivers, and store in a local location. From properties we will be passing the location of different drivers to our code. The next ones are logfoldername, logfilename properties which we are using to set the location of our log files in log4j.xml.

The third part (represented in purple color) is a plugin to update the properties from pom.xml file to a .properties file inside ‘src/main/resources’ folder.

The last part (represented in red color) is where we are adding the dependencies. As mentioned earlier, we can get the dependencies and their versions by doing a Google search.

  • After updating the pom.xml file, our next step is to create a .properties file. We will use this .properties file to configure the type of browser and as well as for setting the browser properties. Always remember, that we should place the .properties file inside ‘src/main/resources’ folder and not into ‘src/main/java’ directory (keeping the same subfolder structure). For that, we need to create a source folder named resources inside ‘src/main‘ directory.
  • To create a source folder, click on Project name, select New -> Source Folder. Provide the folder name as ‘src/main/resources’.

    Source Folder creation
  • After creating resources folder, our next step is to create a .properties file. Right click on ‘src/main/resources’ folder -> New -> Other. Select File and click Next. Name the file as ‘system.properties’ and click Finish. A blank .properties file will be created inside resources folder.

    system.properties files inside resources folder
  • Now that we have updated pom.xml file and created .properties file, our next step is to update our Maven project with these changes. To update project, click on Project Name -> Maven -> Update Project.

    Update Maven project
  • After successful update, the Java System Library is updated from default 1.5 version to 1.8 version based on maven.compiler.source, maven.compiler.target properties in the pom.xml file. Also the system.properties file inside resources folder is automatically updated with all the properties from pom.xml file.

    system.properties file

With this, we have completed the initial structure of our Hybrid Framework. Our next step is to add the source codes inside our Framework. We will cover this in our next topic. Till then, Live Well and Happy Learning!